How to upgrade ReviOS to a newer version?
Information and prerequisites
With newer builds of ReviOS we provide 2 separate ISOs. One for installing a completely new ReviOS instance, and one for upgrading a previous ReviOS version. This way, the users can update their ReviOS instance without reinstalling and losing files.
This is an EXPERIMENTAL method. Upgrading was tested numerous times, but we obviously cannot cover all the edge cases, so use this with caution!
This method is only working if you are upgrading a previous ReviOS installation that is at least on the 21H2 Windows version, or a stock Windows (but for that a complete fresh installation is more preferable). Upgrading from other custom tweaked systems is neither working nor supported. Cross-upgrades, like from ReviOS 10 to 11 or vice versa, should work, but it is not tested.
You need at least 20-25 GB of free space on the partition you have ReviOS installed on (usually called C:).
Download the ISO
Download the latest Upgrade build of ReviOS 10 or 11 from the Download page of our website.
Make sure you download the Upgrade option.
Verification
- Automatic Method
- Manual Method
Using an automatic tool made by Stasium, you can automatically verify the downloaded ISO. You can download it here.
After downloading the .zip file, extract it to a location of your choice. You will then see a revi-verifier.exe file. Drag the downloaded ReviOS ISO onto this program. It will scan the file and check if it was not corrupted during download.
If the program reports an error with the file, you should download the ISO again, preferably from another source. Multiple alternative sources can be found on the Revision Discord.
On Windows, go in the File Explorer where you downloaded the ISO file, and Shift + Right-click on an empty space of the window, and select Open PowerShell window here. Type in the following command:
Get-FileHash -Algorithm MD5 -Path <file name>
Replace the <file name> part with the exact name of the ReviOS ISO name. You can use the TAB button to autocomplete the file name.
For example:
Get-FileHash -Algorithm MD5 -Path .\ReviOS-10-22.10.iso
The command will then return the file hash; compare it to the corresponding MD5 hash value on the Verification page. If they are the same, your ISO file is not corrupted, and you can carry on with the installation process.
Preparation
First of all, it is mandatory to extract the files of the ISO file on the partition where ReviOS is installed. You can do so by either by mounting the image and copying the files out, or by using a file archiver software, like 7-Zip.
This is important since the upgrading process will not work by running it from the mounted ISO.
The upgrade process will not work if you extracted the ISO to a USB or a network mounted drive, so make sure the files are on your C: drive. The easiest way to proceed is to extract the files to a folder on your Desktop or in the root of your C: Windows partition in a folder.
If using ReviOS 22.10 builds or newer, it is mandatory to disable Windows Defender, User Account Control (UAC), and Fast Startup via Revision Tool.
Running the upgrade
All you have to do now is run the upgrade.bat file. If you do no have an upgrade.bat file, or if you get an error when running it, just run the setup.exe file.
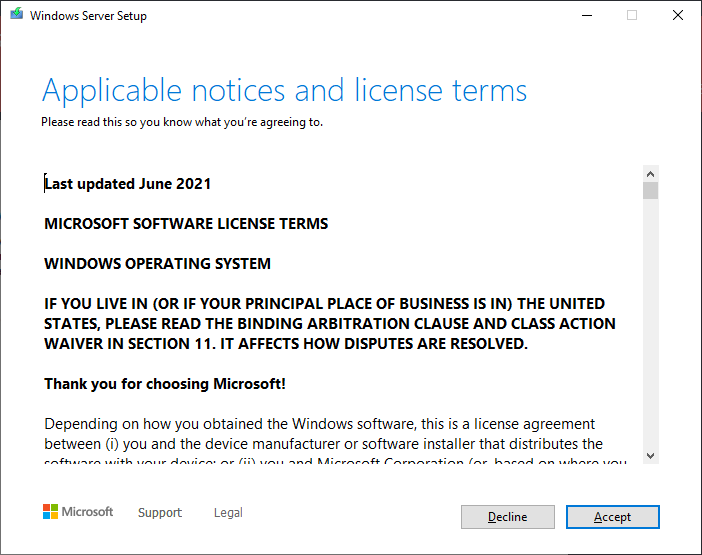
The following should open. If not, see the Possible issues

Here, just go through with the default settings the installer gives you, and select keep files and apps. (Next, Accept, Install)
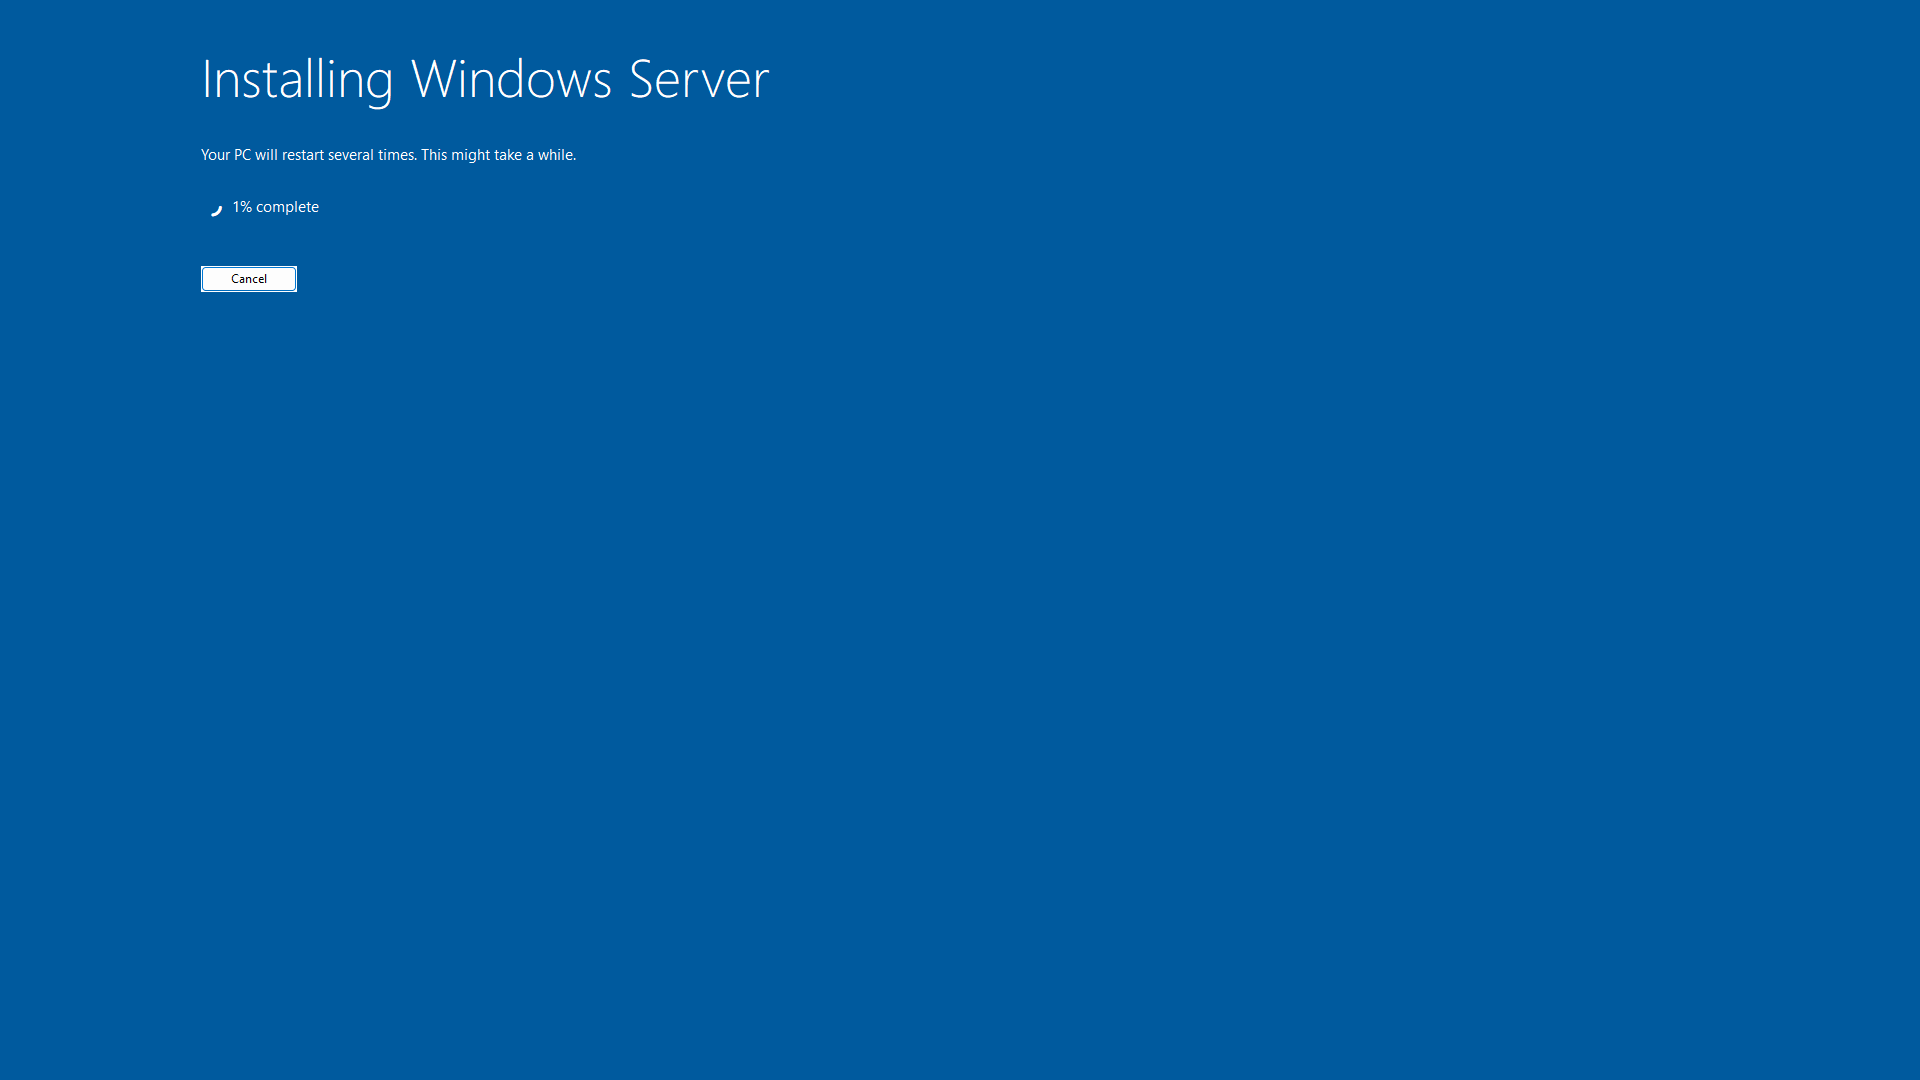
You should then arrive to the following screen:
It is not actually installing Windows Server. ReviOS tricks the setup.exe file which gives people the ability to upgrade to ReviOS 11 builds on hardware without TPM and SecureBoot.

From now on, you just need to wait. The duration of the upgrade process will depend on your PC specs and your HDD/SSD speed, as the installer has to duplicate the OS and then set up the new one.
While upgrading, your OS will reboot multiple times.
Possible issues
Unable to create required installation folder // Error code: 0x8030002F
If you have done everything according to the guide, a restart usually solves it.
If a reboot has not solved it for you, you are probably affected by the issue in Windows itself. You can try the following steps in order.
- If you copied the files from the mounted ISO or used WinRAR before, try 7-Zip for the extraction and then run the
upgrade.batfile again. - Run the
setup.exefile directly, instead of using theupgrade.bat, and select not to install updates, although it seems like this setting does not affect the upgrading of ReviOS. - Try step 1 from this guide. This must be a last resort, since it will give access to the
Localfolder insideAppDatafor everyone and everything.
If none of these steps have solved the issue, you will have to do a clean installation. Upgrading will not work on your machine.
Defender isn't disabled
The issue occurs if you haven't disabled Defender before upgrading. To fix it, follow the steps.
INSTALL_RECOVERY_ENVIRONMENT
Run Terminal or PowerShell as administrator and enter reagentc /disable and once the upgrade process finishes enable it again reagentc /enable.
Finishing Steps
After upgrading, the OS will run its preparation again, similarly to a fresh installation. By default, ReviOS does not remove the Windows.old folder, because some users may prefer old version. To clean it up, you can run Disk Cleanup as administrator and choose Previous Windows installations(s), more information.