How to install ReviOS
We discuss here the installation of ReviOS with a USB drive (or usually called a flash drive in the guide). This guide also mentions a way to boot into the installer without a USB drive, but the main supported method is to use a flash drive. Another way is to use iidanL's script, InstallWindowsWithoutUSB. However, we do not support this method of installing, so use it at your own risk. (TL;DR: It sets up your new Windows to dual boot.)
Preparations
BIOS vs UEFI, MBR vs GPT
If you do not know if your PC is capable of UEFI booting, please consult your motherboard's or laptop's manual.
Alternatively, you can go into your BIOS, which can usually be achieved by spamming the F2 or Del button when your PC is starting up. Then, inside the booting menu, search for a setting where you can switch between option usually called "UEFI" or "Extended" and "Legacy" or "BIOS".
These technologies usually come in pair, like UEFI and GPT or BIOS and MBR. And while you could switch things up, like UEFI and MBR or BIOS and GPT, it is not recommended. Here, for example, the UEFI and GPT pair means UEFI boot mode on GPT partitions. Moreover, UEFI systems are usually backwards compatible and can boot in Legacy mode, often called CSM. If your system has CSM, it is recommended to switch it off, as the booting will probably be done in Legacy or BIOS mode rather than UEFI.
In short, if your PC is capable of booting in UEFI mode, we recommend selecting GPT. If not, select MBR later on when making a bootable flash drive.
Drivers
A very important step is to download your drivers before starting the Windows install process, or at the very least your network drivers. It is much easier to just download the driver before reinstalling, rather than booting into your new installation of ReviOS, and realizing you have no internet -and to download your drivers, you need internet-.
If you do not know how to download your drivers, we can provide you with a general idea, but PC manufacturer websites are not the same.
The fastest way to find your drivers is to just Google "<your motherboard model or laptop model> drivers", without the < and > symbols. Click the search result which takes you to the official website of of your device manufacturer. In there, find the drivers, which will probably be either directly shown to you when you click the link, or under the Support section of the website.
After you download your drivers, you should put them directly on the installation flash drive. We recommend that you copy the files after the 2nd step, and before the 3rd
Alternatively, and this method should not be considered the default option, download the network drivers with Snappy Driver Installer Origin and backup the whole folder of it on your flash drive before you format your partition(s). Help on this method can be found on the How to install drivers page.
Check what drives and partitions you have
You should now check what drives and partitions you have on your system, and more specifically how they are identified.
In your PC are one or more drives. They can be of any type, such as HDD and SSD. Drives can be divided into partitions, which is always the case for the drive windows is installed on. They virtually divide your single drive into multiple segments, that can each have their own drive letter.
This guide mostly talks about partitions.
Windows uses the terms "disk" and "drive" interchangeably. So they mean the same.
Open Disk Management by right-clicking on the Start menu icon, and selecting it.
Should look like this:
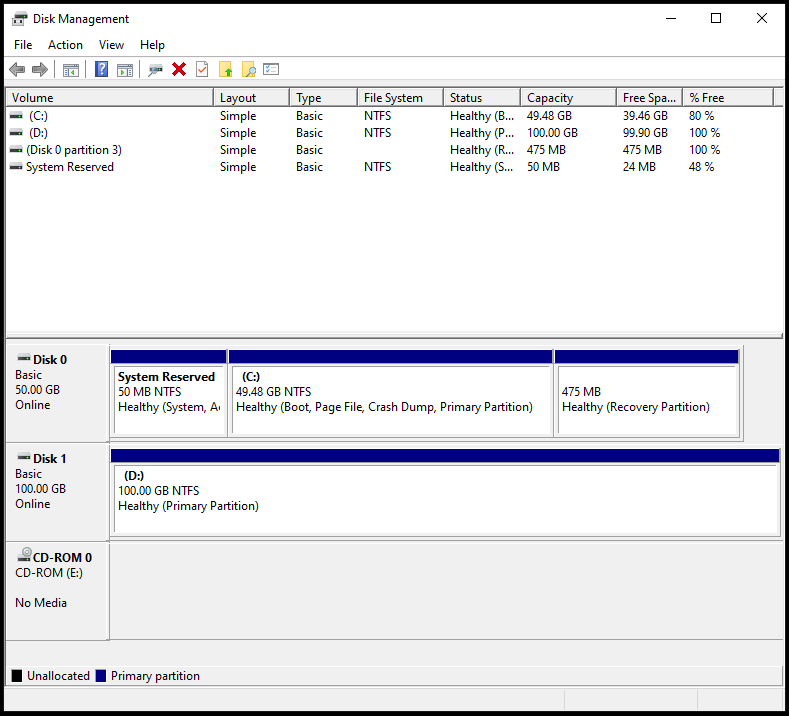
The recommended way to do the installation is to delete the partitions storing the OS in the Partitions section. This usually is the C: partition, plus the
System, Reserved and Recovery partitions. You can format your other partitions too, but make sure you backed up your important files beforehand.
Additional advice if you are worried you will not be able to identify your partitions inside the installer, take note of their sizes and their number. If you have multiple partitions with the same size, take note of the free space, too.
Take for an example the picture above.
Here I have two drives, with the first having 3 partitions, and the second only one. This is a common setup, where the user has a drive which holds the OS, and another drive for everything else, e.g. data, movies, games.
I would note the following:
Need to be deleted:
- System Reserved partition, Disk 0 Partition 1, size: 50 MB
- The main partition of Windows (C:), Disk 0 Partition 2, size: 49.48 GB
- Recovery partition, Disk 0 Partition 3, size: 475 MB
Free to do whatever you want:
- Data partition, Disk 1 Partition 1, size: 100 GB
Another example would be if you have a similar setup to the picture, but with a 100 GB "D:" partition on the first disk, not on the second. Here again I would note almost the same, except the data partition is Disk 0, not 1; and Partition 4, not 1.
To reiterate, you will need to delete all OS partitions, not just the C: partition, but every system, reserved, recovery, etc. partitions too. You can easily identify them by their small sizes during the install process.
Backup
This Windows install method will Wipe your previous OS. As such, you should backup all of your important files before proceeding. You can either use a separate partition to save your data, or you can move your data to a flash drive. You could even use the flash drive you use to install Windows so long as it has enough storage space left, just after the 2nd step, but before the 3rd.
Download ReviOS
You can find our supported ReviOS versions on the download page.
Download the the regular version of your selected ISO, and not the Upgrade version. If you need help choosing the right version of ReviOS: What is the difference between the versions?
Verification
This step is very important, as it can save you a lot of time and troubles in the future.
- Automatic Method
- Manual Method
Using an automatic tool made by Stasium, you can automatically verify the downloaded ISO. You can download it here.
After downloading the .zip file, extract it to a location of your choice. You will then see a revi-verifier.exe file. Drag the downloaded ReviOS ISO onto this program. It will scan the file and check if it was not corrupted during download.
If the program reports an error with the file, you should download the ISO again, preferably from another source. Multiple alternative sources can be found on the Revision Discord.
On Windows, go in the File Explorer where you downloaded the ISO file, and Shift + Right-click on an empty space of the window, and select Open PowerShell window here. Type in the following command:
Get-FileHash -Algorithm MD5 -Path <file name>
Replace the <file name> part with the exact name of the ReviOS ISO name. You can use the TAB button to autocomplete the file name.
For example:
Get-FileHash -Algorithm MD5 -Path .\ReviOS-10-22.10.iso
The command will then return the file hash; compare it to the corresponding MD5 hash value on the Verification page. If they are the same, your ISO file is not corrupted, and you can carry on with the installation process.
Making a bootable flash drive
Ventoy
This method will wipe everything from your flash drive. Make a backup of your important files. After installing Ventoy and setting up your ReviOS ISO on the flash drive, you can put your files back in the flash drive if you have enough space. The flash drive will most likely be named Ventoy.
With Ventoy, you don't need to format the flash drive over and over, you just need to copy the ISO files to the USB drive and boot from them directly. You can have multiple ISO's ready for use at any time; Ventoy will provide you with a boot menu to select one of them.
You can download Ventoy on the official website of the software.
You do not need to install Ventoy; after extracting the zip file, just open Ventoy2Disk.exe.
It should look something like this:
Select your USB device from the dropdown menu. If it is not present, in the Option menu select the Show All Devices option to show everything. However, be sure to select the right device in the dropdown menu, because with this option enabled, every storage device on your PC will be listed!
Select the partition style/scheme of your choice from Option -> Partition Style. More detail in BIOS vs UEFI, MBR vs GPT section
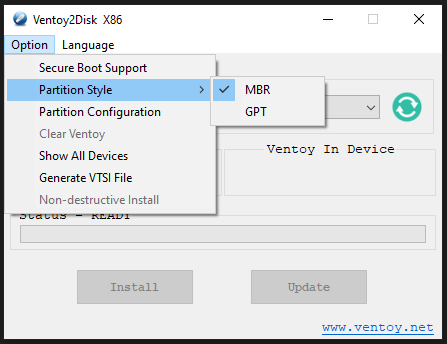
Additionally, you can select the Secure Boot Support, especially if you have Windows 11 and plan on playing with games or anti-cheat that require it.
Now click on the Install button.
After the software finishes, you can close the window.
You can now copy the ReviOS installer ISO to the flash drive, that is now called Ventoy.
On Linux, using Ventoy should be very similar and uses the same options.
If you do not have a USB drive
On Windows, go into Disk Management, and select one of your partitions that has at least 4 to 5 gigabytes of free space. Right-Click on that partition, and select Shrink Volume.... A new window will pop up asking the size of the new partition, in megabytes. Put in 5120, which is around 5 GB, but make sure whatever value you put in is at least the size of the ISO in GB multiplied by 1024, and add an extra 100 MB.
A new partition will pop up. Right-Click on it, and select New Simple Volume.... A setup wizard will appear, and there you can select the letter and name of the partition.
When you are done, you can extract the contents of the ISO file to the new partition. The following steps should be the same, but note that this guide will call your partition with the ISO files a flash drive, not a partition.
Booting from the flash drive
Boot menu
First consult the manual of your motherboard or laptop, and find out which key opens up the Boot Menu.
When you restart your PC, after it shutdown, and just started to boot up again, start spamming that key until the menu opens.
A list should come up with all of your boot options. Usually, the last option in the list is to access your BIOS. Choose the option with the name of your flash drive. If you have multiple options with it's name, choose the one that boots in UEFI mode if you selected GPT when preparing the flash drive. If you can't see the names, but only USB Drive and Optical Drive and Hard Drive or similar names , choose the USB Drive as your boot option.
Changing boot order in BIOS
Alternatively you can go inside your BIOS settings, and change the boot order. This is a list that tells the BIOS what to boot first. So when your PC boots, it will try to boot from the first option of the list first. If that is not working, it tries the second option, and so on.
This option is not optimal, since when you're done with your Windows installation, before booting into the OS the first time, you have to change the boot order back to default in BIOS or remove the the flash drive before booting; You will boot into the installer again otherwise.
Installing
If you have followed every step properly so far, and used Ventoy, a menu will show on screen with the option to select an ISO to run. It will look similar to this image:
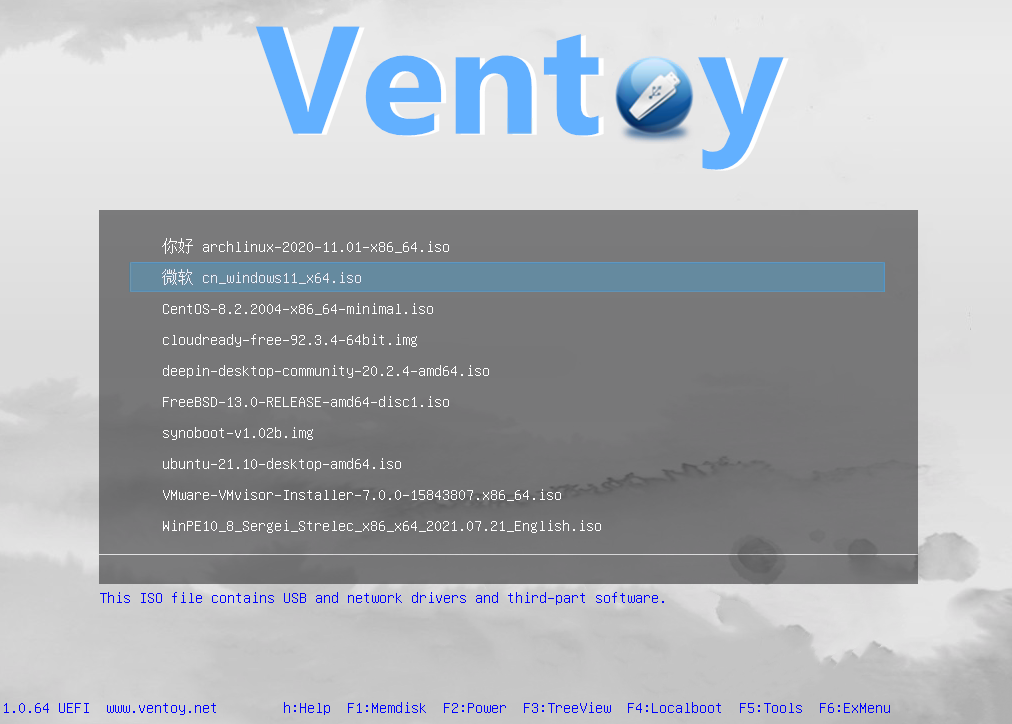
Select the desired ISO file. If this is your first time using Ventoy and you only setup the ReviOS ISO, it will be the only entry in the list, unlike the picture.
When the installer boots up, it should look something like this:
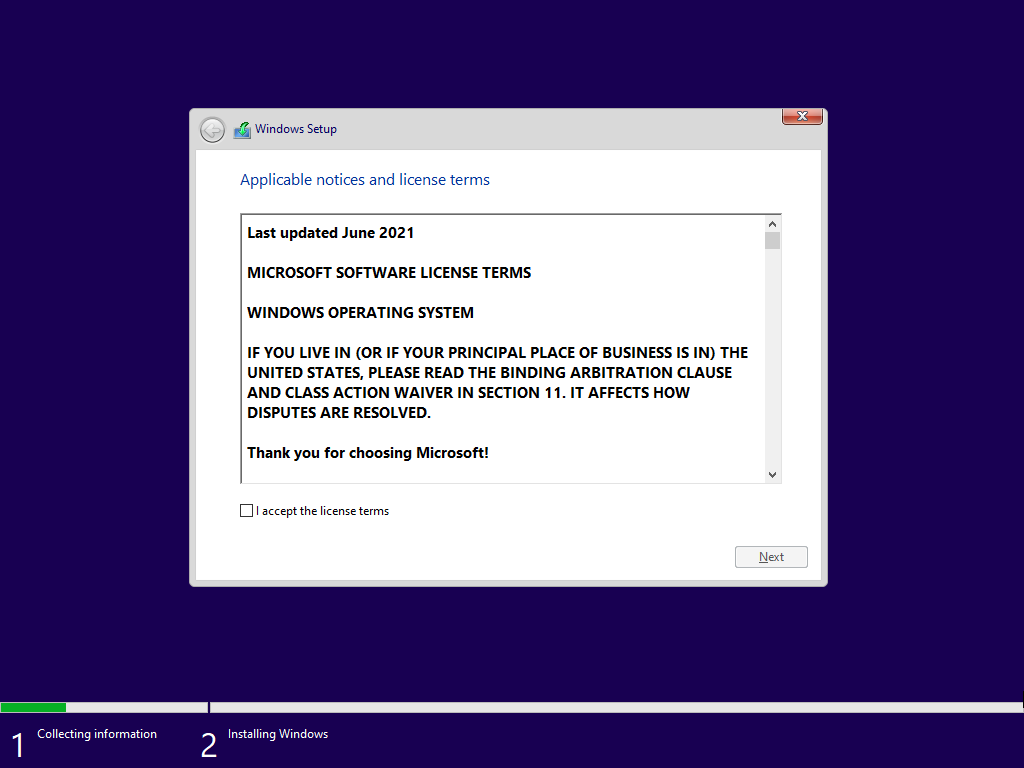
Accept the license terms, and then the disk selection step comes up. Here you have multiple choices, depending on the configuration you are using.
Partitions
When you arrive to the partition making and selecting part of the installing process, but the installer asks for drivers, you might need Intel Rapid Storage Technology (IRST) drivers. Here is a helping guide from the Asus Support page.
This part of the setup relies on you knowing your drives and partitions, which we discuss in the Check what drives and partitions you have section.
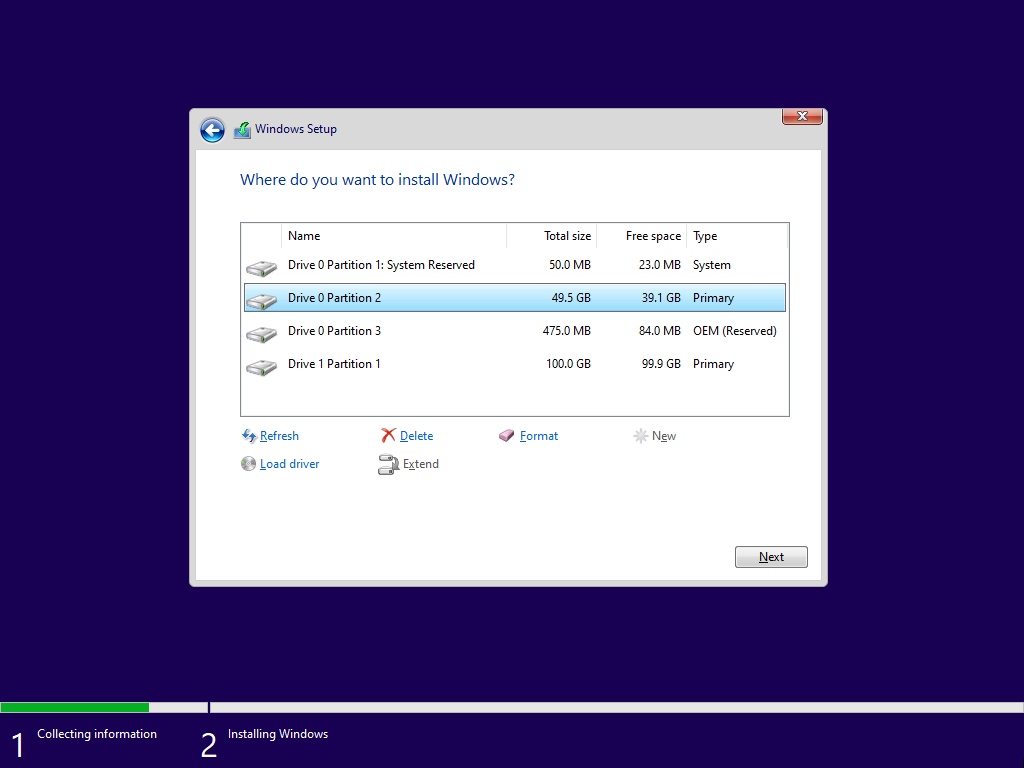
Check what partitions your previous Windows installation uses, and delete those with the Delete button, then select the new Drive that pops up after deleting all the partitions, and click Next.
Additionally, if you want to completely wipe your disk and other partitions you might have, you can format your other partitions too (Such as an HDD).
The installation process will then start, and you won't need to do anything for a while.
When the installer is done, your PC will restart automatically. The OS will then load for a bit, with the text Getting ready on the screen, and it will restart once again.
Finishing the installation
On Windows 11 this section looks different, but the steps should be the same. Furthermore, in newer builds of ReviOS, we added the possibility to change the language and keyboard here. This tutorial does not reflect that, since the pictures have not been updated in a while.
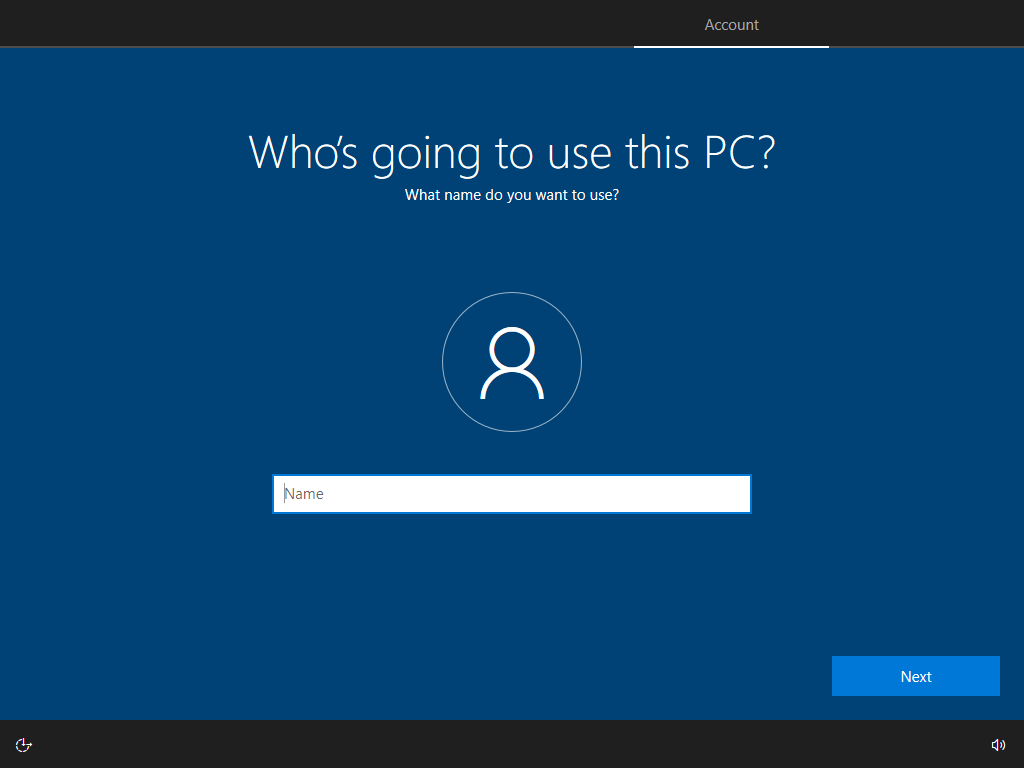
After the last restart you should arrive at this screen, where you have to choose your Windows username:
Skipping this can lead to a bug, and you won't be able to log in.
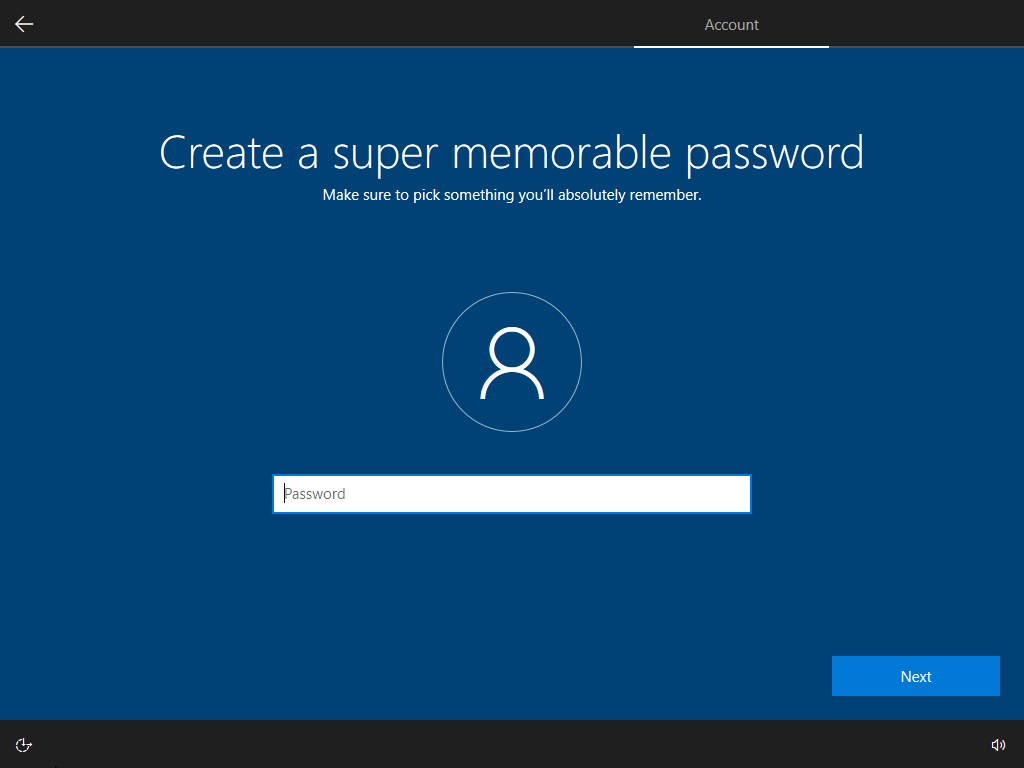
And then you'll have to choose a password. If you do not want to set a password, you can skip this prompt by clicking on Next.
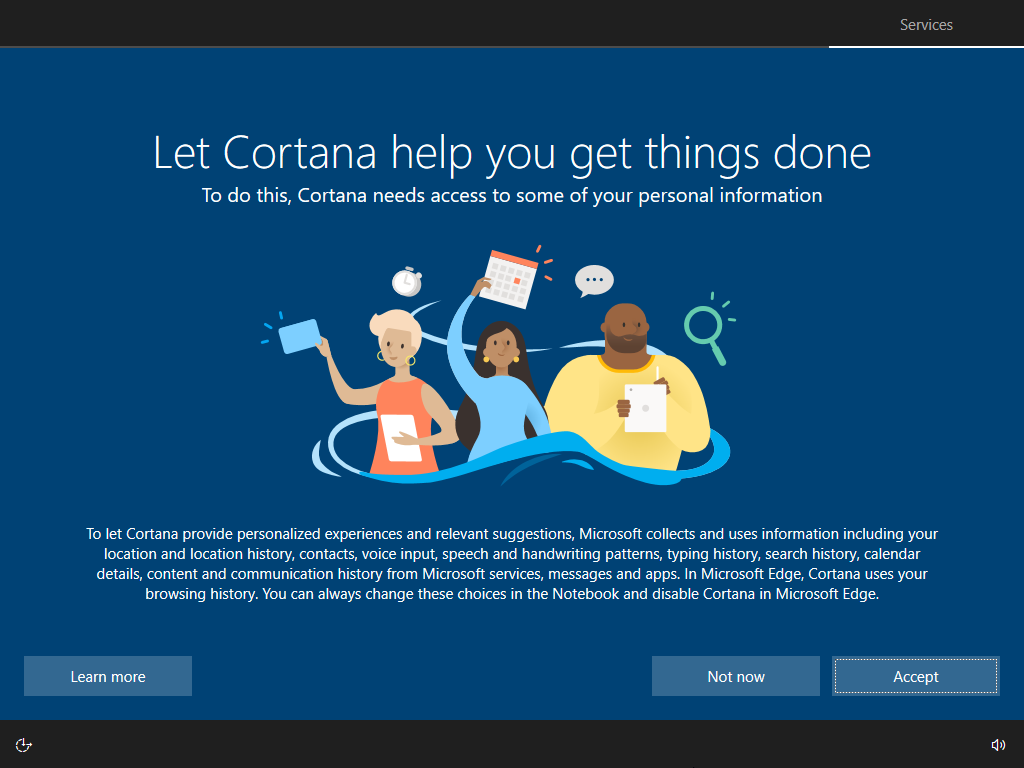
Here just press Not now. Even if you press Accept, Cortana will most likely not work.
You are now done with the Windows install setup, and your OS will load for some time.
Once you arrive on the desktop, don't do or touch anything. An automatic post-install script will pop up, run some important tweaks, and restart your machine.
Once the PC boots up again, you can follow the ReviOS Post-Install guide for initial setup instructions, tweak suggestions, and further tips and tricks.